Kimono pendant

A quick, free description/tutorial on how I made this Kimono pendant in the pictures 🤗

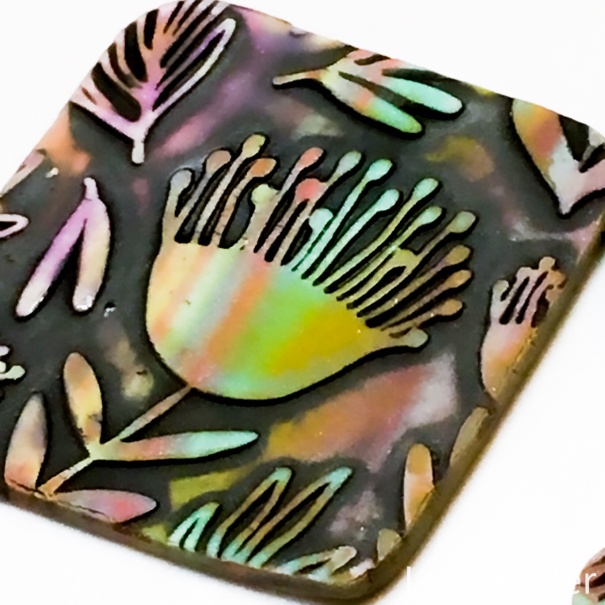
I used an old green veneer on soft black clay to get a crackled sheet of clay.

That was then cut to make the sleeves and body of the Kimono

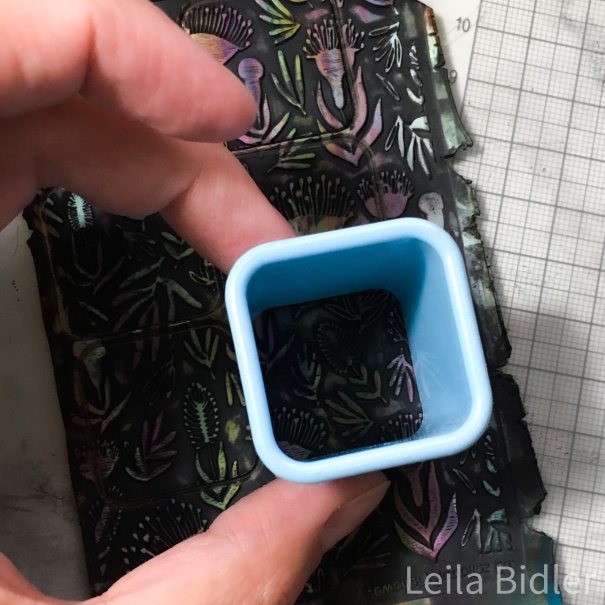
I then did add some silver leaf to a sheet of black clay and silkscreened it with acrylics and cut out the collar, side pieces and the circle in the center.

I used just a stiff and a bendy blade and a round cutter.

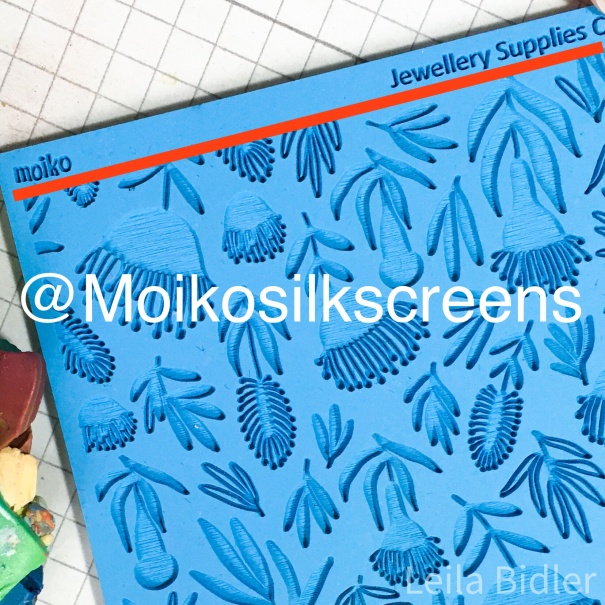
The black bar on top was cut by first drawing it on paper and then onto the clay that I textured with my clay texture sponges, fine grit.

I did use a little bake and bond between the clay pieces and cured them.

I then added a sheet of thin black clay to the back (using some more liquid clay) and used the clay texture sponge again to push it onto the border. This way I got a clean back and sides and it will hold the whole thing together. (click here to see how that is done and contact me if you need the sponges)

Bake again

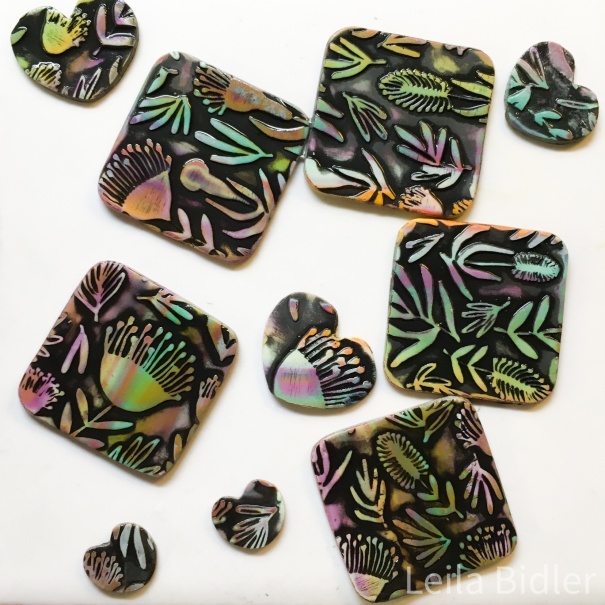
Now I used a tiny kemper cutter to make the flowers, added the thin black dots and lines, a dot of bake and bond and back in the oven again

I then put the black bar and the kimono together and with a pencil made a mark on where to drill holes, put in the bend wire with some black clay and more bake and bond, last baking.

Then I did add the glass beads, the bar and created loops at the end to string it on a chain.

P.s. colors look different because I use artificial and natural light, the real color is more on the green side

Textured watercolor effect tutorial

Look what just came in the mail today: my new awesome textures stamp from Moiko!

https://instagram.com/moikosilkscreens

Thank you so much my dear friend!

Her silkscreens and texture stamps are all wonderful and the best quality you can find out there! Here is a direct link to her shop on Etsy: https://www.etsy.com/market/moiko_silk_screen

(I do not get any payment for these link, I truly love her products and use them since she first started making silkscreens many years ago!)

What shall we do with this pretty new texture stamp? Read on for this quick, easy and fun tutorial!

Materials and tools needed:

  • mixed, light colored scrap clay
  • a moiko texture stamp
  • black chalk pastel or Pan Pastel ® and a soft bristle brush
  • talcum powder
  • scotch / adhesive tape
  • clay cutters (any shape you like)
  • clay roller or pasta machine
  • sanding sponges / paper grit P1000
  • clay blade

Start by cutting up some mixed and preferable light colored (scrap) clay, you don’t need much, just enough to make a nice sheet of clay as big as he texture stamp.

Roll out your clay, fold and roll just 2-4 times to lightly blend the colors, but don’t overdo it!

Dust the stamp with the slightest amount of talcum powder (if you are using sculpey brand clays you can also just spritz a bit of water on it), place it on the clay sheet and roll it thru the thickest setting of your pasta machine, or roll over it with your hand roller to get a nice impression.

Now grate some black chalk pastel or use Pan Pastels ® (I used Pan Pastels ®) and cover your entire sheet of clay using a soft bristle brush.

Take some adhesive tape and lightly tap the surface to remove the black powder from the raised areas. Repeat several times, always using a light touch to remove as much powder as possible. Do not push down to not distort or flatten the design.

Cut up the sheet with a shape to your liking and then bake the clay and let it cool.

After your clay has been properly cured use some sanding sponge or sanding paper in a medium/fine grit (I am using P1000) and using some water and soap lightly sand the raised areas to really make the colors pop.

Contrary to popular believe there is no need for varnish to “protect” chalk pastels esp PanPastel ® as it will not even come off by using water and soap, you really need to sand it off.

OPTIONAL: after sanding you can make them shine and the colors, esp the black pop by using varnish, resin or liquid clay. For a tutorial on how to use liquid clay I have a great video tutorial for you HERE

Winter Celebration online workshops!

Early bird registration for this awesome Winter Celebration event!

Register here https://beagrob.com/?page_id=8493&aff=9

I will teach you how to decorate a lantern with a winter scene composed of an igloo that lights up inside and exchangeable decorations on the roof, ice and snow and led lights all around to make for a fantastic table decoration that will light up the room!

Join me and other three awesome mixed media artists in this online adventure with dedicated fb group, detailed video lessons in English and you can interact with other students and ask us teachers questions and share your art with everyone!

Register NOW to get it all for just 20chf instead of 25chf (aprox 22usd instead of 27usd).

The Winter Celebration event will start on November 13th 10am CET

Register here https://beagrob.com/?page_id=8493&aff=9

#wintercelebration #wintercelebration2021 #mixedmedia #mixedmediaart #mixedmediaartist #polymerclay #babie #alteredart #altereddoll #artdoll #artbrush #watercolor #winderlantern #leilabidler #winterdecor #winterdecoration #onlinecoaching #onlineworkshop #creativeevent #howtovideo #sculpey #igloo #letitsnow

Nuovo Tutorial!

Ho fatto un tutorial video disponibile sia in italiano che in inglese per modellare una Manta con il Fimo e su come utilizzare i prodotti Swellegant!

Ecco un’anteprima, contattatemi se siete interessati ad avere il video tutorial!

La mia mail per contattarmi: gom6699 @ yahoo.it (togliete gli spazi)

Link utili per attrezzi vari!

Spesso le persone mi chiedono cosa uso o dove ho comprato questo o quello….ovviamente negli anni si trovano, sperimentano e accumulano un sacco di materiali e attrezzi e si filtrano man mano quelli più utili e più usati.

Mentre ancora anni fa dovevo ordinare all’estero perché o non si trovavano proprio le cose o erano vendute a prezzo d’oro…adesso quasi tutto lo trovate anche su Amazon!

Spoiler: spesso non servono “cose fatte apposta” perché sono solo copie più care di attrezzi o oggetti già esistenti 🤗

Qui l’elenco di quello che uso di più e che non può mancare nel mio studio, spero possa esservi utile!

Link Amazon

(In qualità di Affiliato Amazon io ricevo un guadagno dagli acquisti idonei)

Per fare buchi in qualsiasi creazione anche dopo la cottura:

trapanino

https://amzn.to/3ATZxFM

Ovviamente senza macchina per la pasta non potrei lavorare e suggerisco sempre la marca italiana Marcato Atlas – su amazon guardate sempre tra l’usato, spesso sono nuove solo state in esposizione ma costano meno

https://amzn.to/3B7cwV7

Ovviamente con il motore diventa tutto più facile – avrete due mani libere non si fa fatica anche con pasta dura

https://amzn.to/3z2o2zb

Piatto rotante per lavorare meglio e fare filmati /foto degli oggetti creati

https://amzn.to/3dgDq2D

Tagliere vetro su cui lavorare:

https://amzn.to/3dghdlr

Mini cutter:

https://amzn.to/3A2jDNZ

Di rulli sono utili due tipi, uno con manico per avere maggior controllo per ridurre ad esempio murrine:

https://amzn.to/3dhcAHI

E uno normale trasparente, è importante che sia tutto pieno e non vuoto dentro e diffidate dalle imitazioni da poco, spesso reagiscono al Fimo e si crepano. Questo lo uso da oltre 10 anni…

https://amzn.to/3dfMHIh

Lame…prendere un set che durerà quasi tutta la vita, contiene una sottile e flessibile per tagliare curve, una ondulata per creare anche effetti interessanti e una rigida adatta a tutto il resto:

https://amzn.to/2UuMBG3

Essenziale: termometro da forno…lo so questo sembra caro, ma calcolando che ho il mio da almeno 6 anni e non sbaglia un colpo la spesa è irrisoria spalmata sul tempo

https://amzn.to/3jevDpV

Anche questo non è male:

https://amzn.to/3gYVf8N

Non badate alla descrizione 😂 sono semplici piccole piastrelle circa 10x10cm perfette per lavoraci sopra e da infornare direttamente con la creazione:

https://amzn.to/3ji3vSK

Forme di metallo su cui cuocere per avere pendenti e forme bombate:

https://amzn.to/3A3dBN6

Kit per modellare, specie su cose molto piccole. Anche qui…vi prego…non badate alla descrizione 😅:

https://amzn.to/3A0i6Ii

poi assolutamente anche questi:

https://amzn.to/2T8oGMn

Pennelli per lavori di fino, miniature ecc:

https://amzn.to/3ji2hHg

Infine uno dei pochi libri tradotti in italiano di una grande artista e persona, Carol Blackburn:

https://amzn.to/3jgQOaY

Operation Stingray!!!

Sting Rays have various forms and live both in salt and fresh water and are cartilaginous fish, just like sharks

Ita:

Le razze hanno varie forme e vivono sia in acqua dolce che salata e sono pesci cartilaginei, proprio come gli squali
Faccio parte del team creativo di quest’anno Mighty Mitten 2! È così eccitante!

Cos’è il “Mighty Mitten 2”? È un fantastico evento (online … sai Corona blablabla) ospitato da Christi Friesen e una grande squadra di creativi pazzi unirà le mani, il cervello e le tazze di caffè per offrirti divertimento, tutorial, chat dal vivo e follia casuale.

Puoi unirti al divertimento qui: www.christifriesen.com/workshops

**********

ENG:

I am part of the creative team for this years Mighty Mitten 2! That is so exiting!

What is the “Mighty Mitten 2”? It’s an awesome (online…you know Corona blablabla) event hosted by Christi Friesen and a great team of crazy creatives will join hands and brains and coffee cups to bring you fun, tutorials, live chats and random craziness.

You can join in the fun here: www.christifriesen.com/workshops

ITA: Cosa insegnerò durante questo evento? Come fare delle magnifiche Razze:

***

ENG: What will I teach during the event, you ask? How to make awesome Manta Rays:

ITA:

Hai paura di non essere a casa e online durante i 3 giorni dell’evento? Non aver paura! Avremo un gruppo fb privato solo per i partecipanti dove potrai accedere a tutte le info e video e anche alle live chat se ti mancano anche dopo e potrai fare tutte le domande che vorrai e avere link a offerte e sconti esclusivi!

Ci vediamo li? Ci vediamo li!!

ENG:

Afraid you might not be home and online during the 3 days of the event? Fear not! We will have a private fb group for participants only where you can access all the info and videos and also the live chats if you miss them even afterwards and you can ask all the questions you want and have links to exclusive offers and discounts!

See you there? See you there!!

Corsi virtuali Fimo gratuiti!

Pronti per l’evento polimerico virtuale dell’anno????
Non possiamo vederci dal vivo – e allora organizziamo un bel festival online!!!!
Una volta che cliccate sul link dovrete registrarvi con una vostra email valida. Importante: dopo esservi registrati riceverete un a email di conferma, DOVRETE cliccare il bottone verde “CONFIRM” nella mail, o non risulterete registrati.
Con questa registrazione riceverete delle email riguardo l’evento che funziona in questo modo: per 7 giorni, dal 24-30.3.2021 ogni giorno verranno presentati diversi artisti per un totale di 17 creativi internazionali.
Giorno per giorno potrete man mano accedere e guardare GRATUITAMENTE i video tutorial (in lingua inglese) e vedere foto e interviste.
Avrete di diritto di vedere ogni tutorial di ogni artista man mano che vi arrivano i link una volta al giorno.
Se volete invece avere accesso a TUTTI i video di tutti i 17 artisti + materiali extra e contenuti aggiuntivi, per esempio pdf da scaricare potete invece comprare il PREMIUM PACK. Questo vi darà diritto di accedere a vita ai video e contenuto e di vederli e rivederli tutte le volte che volete, tra un mese, tra due, per sempre. Vi darà anche diritto di scaricare i file aggiuntivi e tutorial bonus.
Io ad esempio metto a disposizione due file con il tutorial anche scritto, di cui uno in italiano per facilitare chi non parla bene inglese, ci sono le istruzioni passo passo e oltre 50 foto che spiegano tutti i dettagli della tecnica e come realizzare stampi per Fimo.
Fino al 24.03.2021 c’è anche uno sconto del 25%

Regalino di Natale!

Ciao tutti, è da un po’ che mancavo da questo blog, è stato un anno decisamente impegnativo…ma non per motivi belli insomma…

Quindi ho deciso di rifarmi viva in questo periodo per fare a tutti un piccolo regalino a tutti voi che state leggendo questo post. Abbiamo bisogno tutti di colori, sfoghi creativi e distrazioni positive – quindi perché non realizzare piccoli decori natalizi da usare per l’albero, da attaccare ai regalini, decorare cose a caso in giro….?

Potete scaricare il tutorial in formato PDF cliccando qui sotto, ci sono due versioni, una in italiano e una in inglese, scegliete quella che preferite.

Il tutorial è adatto sia per essere utilizzato con paste che asciugano all’aria (porcellana fredda, Makin’s clay etc) ma anche con ceramica sintetica che va cotta in forno tipo Fimo, Premo, Cernit ecc.

Buone Feste a tutti, che possiate essere al sicuro, al caldo e stare bene.

Decori per l’albero!

Come ogni anno il Natale arriva quando arriva…ed è meglio essere preparati!

Ecco un modo veloce e facile per realizzare decori sia per la casa che l’albero ma anche come regalo per i nostri cari: usare la pasta modellabile che non necessita di cottura Makin’s Clay® !

Prendete un colore di Makin’s Clay® che più vi piace e si abbina allo stile dei vostri decori e una pallina per l’albero di quelle in plastica che si aprono in due metà.

Vi servirà anche qualche timbro o texture e delle formine per biscotti a tema, in questo caso ho usato una formina ad albero e una a stellina.

Sfogliate la pasta usando rullo o macchina per la pasta, imprimete la texture (in questo caso ho usato una texture di Lisa Pavelka) e ritagliare le forme desiderate.

Assemblate i pezzi di pasta con colla tipo vinavil o acqua e inserite nella pallina:

Uno dei miei attrezzi preferiti: l’estrusore!

Oggi voglio presentarvi il meraviglioso (e comodissimo da usare) estrusore della Makin’s Clay®

MAKIN’S PROFESSIONAL® ULTIMATE CLAY EXTRUDER® DELUXE SET

Questo estrusore combina in un’unica confezione l’ultima generazione di estrusore ad avvitamento con un manico molto comodo da girare a forma di “L” con ben 15 dischetti dal design più popolare, ben 3 adattatori Claycore® (1mm, 2mm & 3mm) e due guarnizioni di scorta.

Gli adattatori Claycore® vi permettono di realizzare tubicini vuoti all’interno, quindi di fare perle lunghe, parti di bracciali e collane già bucati, ganci ecc usandoli in combinazione con tutte le varie forme.

Ecco come si presenta la confezione:

Come vedere la maniglia ad “L” permette un utilizzo senza sforzo

Per usarlo semplicemente svitate la parte davanti, inserite un rotolino di pasta sintetica dal diametro più o meno del tubo dell’estrusore stesso, mettete il dischetto con la forma che desiderate e ri-avvitate la parte davanti.

Ora basta girare la maniglia e avrete subito tante forme tutte precise ed uguali, nel mio caso dei rotolini molto fini

Per pulire l’estrusore aspetto il prossimo utilizzo! Non lo pulisco mai appena usato quando eventuali residui sono freschi e morbidi ma lo ripongo e quando devo usarlo ancora uso uno scovolino per bottiglie se ci sono tante incrostazioni nel cilindro, oppure semplice scottex – i residui secchi verranno via senza problemi.

Cosa possiamo realizzare ora con questi fili estrusi?

Un sacco di cose!

Per esempio gioielli, decori per la casa, per l’albero … oppure del vasellame in miniatura come queste ciotole con la tecnica del colombino o manici per tazze adatti ad essere utilizzati per case delle bambole.

Ecco altri esempi di lavorazioni